Notes on a (blue hair) Scandal.

See what I did there…With the title? Yeah, I need to get out more. Before I start in to my epic blue hair adventures, I just want to thank all of my friends, family and anyone else out there who read my last blog post: “Blessed are The Cracked…” I struggled with posting it for a long time, as it went deeper than I usually go.

But when I posted a link to the article on my Facebook page (in an outright act of shameless self-promotion, and deleted it twice before I left it there) I was so blown away by everyones kind words and encouragement. I was walking around glowing for the entire day and it was such a boost in confidence that Im surprised I didn’t sprout peacock feathers out my bum! So thanks again.

Anyways, onto my latest mishap.

so this happened…

blue hair dye

blue hair, don’t care (but kind of do!)

I have been toying with the idea of dying my hair some crazy color for awhile now…and as a lot of my more hair-brained (pun intended) ideas begin, I was up reeeaaally late on pinterest where I created a board just for my crazy hair color inspirations and pinning away.

Now, I will be the first to tell  you, that I get quickly excited about ideas and don’t always think my them through. I just get caught up in the moment and fail to think clearly.

I convinced myself that I was mentally prepared to dye my hair because I went so far as to create a profile on Taaz.com (a website where you can try out different hair styles and make up using pictures of yourself). My idea of “thinking this through” was to  upload a picture and try out some different hair styles. I promptly found and tried the only blue hair color style available, (on the gorgeous katy Perry). This is the picture they had:

Katy Perry's blue hair

Katy Perry’s blue hair

Gorgeous right? Yeah. Aaaaaaand well, here is how mine turned out….just in case you haven’t laughed today…

hahahahaha

hahahahaha

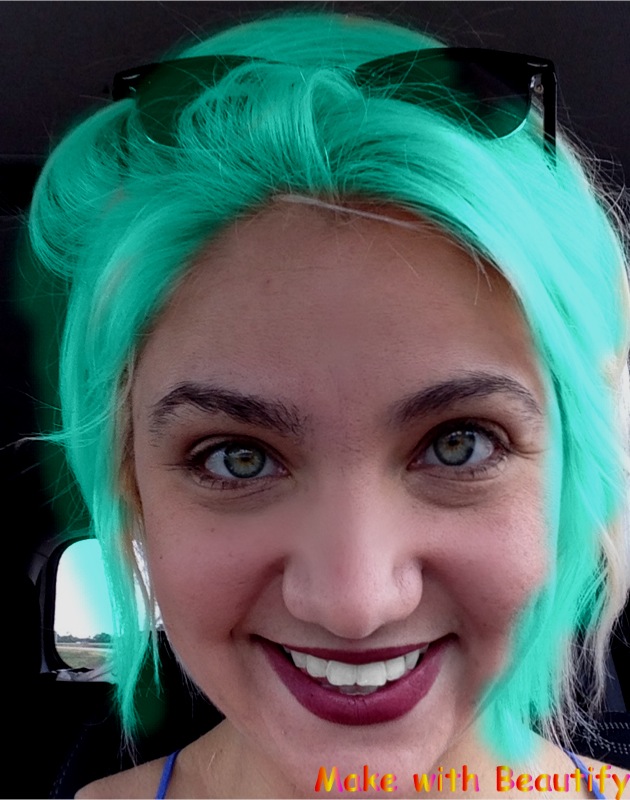
Me and Katy are practically twins! :/ But really, the website was actually really great and these “virtual makeover” websites have come a long way in the years since they first came out and I did it in high school, a good 15 years ago (and I am glad those photos can never be unearthed). Taaz.com, allowed you to contour the hair style to fit better onto your head (as my head is huge and round like a basketball). but I wasn’t done yet! so my next step was to download a free iPhone app called Make With Beauty that allowed me to take a picture of myself and change the color of my hair already. I couldn’t figure out how manipulate the hair color effectively in the app and my hair always ended up looking like it would glow in the dark. but the idea was to see what  I would look like with a lighter shade of blue:

photo-21

Looks like I dipped my head in some radioactive goo…A little to neon/glow in the dark for me- but still closer to what I wanted.

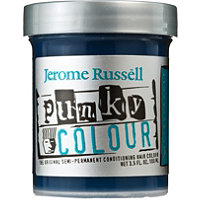
so by now I was getting pretty pumped up about the idea…Maybe a little too excited because following morning, I woke up and went straight to Ulta, where I hastily picked up a bottle of Jerome Russell’s Punky Colour in turquoise for only $9.99.

2205826

And here is when things get sketchy…

in my haste/over-excitement… I didn’t read the directions or the label completely and carefully and what I thought was NON permanent was actually SEMI- Permanent (the back says 5-40 washes).Which is a problem because I needed my hair to be back to a natural blonde hair color by the following week for work.

The directions said to leave it in your hair for 20-40 minutes and since I wanted a lighter color of blue (that would wash out quickly) I left it in for only 15 minutes. Little did I know that my hair was the PERFECT type (damaged, bleached, blonde, dry) to absorb and hang on to allll of the turquoise color.

After I washed out the hair dye, I took a look in the mirror and spent the next few hours washing my hair over and over in a blue blur of anxiety attacks and hyper-ventilating. I called out for help from friends on Facebook and Instagram, and read several articles for home hair color lifter remedies (I wasn’t close t0 being able to leave the house). With friends help and a great article on Wikihow (which I highly suggest looking at if you find yourself in the same position as I did) I tried all sorts of home remedies: soaking my hair in crushed vitamin C tablets, adding dish soap to my shampoo, adding laundry detergent to my shampoo, , adding baking soda to dandruff shampoo and again washing. These helped to lighten the color somewhat  but left me with a new and even scarier problem: severe hair breakage!

It was during my cry for help from my friends on social media that my old college roommate introduced me to the amazing Alison and her blog The Alison Show. She had also dyed her hair a similar color, although she went the preferable route: to a hair stylist. She was so kind and reached out to me and said that she too freaked out when she first saw her hair in the mirror but that it washed out so quickly that she wished it had stayed longer.

After 48 hours of locking myself in my house and washing my hair over 10 times, I had resigned myself to my immediate future as a blue-headed smurf.

Within a few days I ended up really liking my mermaid hair and wishing I could keep it longer,

So here are some of my tips for if you want to dye your hair blue, green, pink or any other fabulous combination:

1) always READ THE LABEL carefully!

2) Before doing a semi-permanant or permanent color try something that will wash out in 2 to 3 washes such as:

Garnier Color Styler: Intense Wash Out Color (only $6.99)

Garnier Color Style Temporary Blue Hair Dye

Garnier Color Style Temporary Blue Hair Dye

or a chalk such as:

Temporary Hair Color Chalk

Temporary Hair Color Chalk

3) Try out different styles using a smart phone app or Taaz.com

4) Be emotionally prepared!

5) Consider the damage level that any hair dye does to your hair


have fun and dye away. If you have any pictures or stories about your wild hair dye adventures, feel free to email me at ourwildpreciouslives@gmail.com with pictures and your story and I will share it!

Happy Memorial Day weekend everyone! Be safe and have fun!

Image

To Kimono, or not to kimono?

That is the question…

kimonooutfit


MEblackkimono


orangekimono


mekimonoblack1

Ever since I first realized that kimonos were coming into style, I was hooked. I love that they each one is so unique and colorful. They are also super comfortable and cozy, and they hide a lot well (and I can braid the fringe when I am bored). But since I turned 30, I have started to question my wardrobe choices seriously for the first time: should I wear leopard print jeans (probably not) should I wear tube tops and short skirts? How about sparkly things (I love some good sequins)? I can only be thankful for friends for being good hearted and not laughing in my face when I show up wearing azctec print, acid wash, holey jeans.

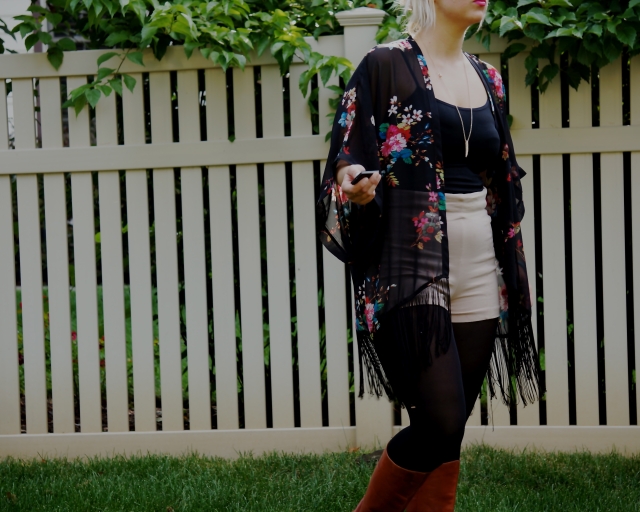
So this summer, while browsing pinterest endlessly for style tips, I started to notice that most women wearing kimonos or shawls were much younger than me. My thoughts were further confirmed when I was in Chicago during the Lollapoolza music festival. Kimonos seemed to be an essential piece of the 20 something’s summer music festival wardrobe, the other essential wardrobe piece: coochie hugging shorts and lots of under butt (Thanks Miley!).  Let’s just say I had some serious concern for the reproductive systems of these girls because it can’t be healthy to have your shorts jammed up your hoo-ha all day long! Think about your future ladies. and I realize I am dangerously close to wearing hoo ha shorts in the last picture, but I got tights and boots on and no under booty I promise!) 

I don’t say this all this to judge these young girls because heaven knows what I was doing and what I was wearing (mostly musty thrift store finds) when I was in college…I am all for being young and care free, exploring new things, expressing yourself and all those other things that come with the roller coaster ride that is the 20’s; I just have to remember that I am not in my 20’s anymore and maybe I shouldn’t be dressing like a 21 year old and making a fool out of myself.

BUT, all that being said…I like my kimonos and my shawls and won’t stop wearing them…but if I start asking you about molly, then someone needs to have a talk with me!


what do you guys think about kimonos? If anyone has a picture of their favorite kimono, or favorite outfit with a shawl, you can email me at forourcity@gm

DIY greeting Cards Idea

I got this fun idea for the above mini greeting cards I made from seeing something similar at etsy.com by Kathy Panton (http://www.etsy.com/shop/KathyPanton?ref=seller_info).

I love the brightly colored maps she used. They are the most vibrant map hearts I have found so far. 
So, for Valentine’s Day, I decided to go all out for my colleagues and make mini-heart cards- I love when friends give me beautiful cards that double as art- so I thought this might be a nice gesture…turns out I love making them…

and of course..super easy to make. All you need is some patterned paper (I got mine from Paperchase). 
and some blank note cards. (and scissors and glue). They are quick DIY projects with big impact!
There are alot of fun and lovely ideas using cut out hearts. Here are a couple more that I want to try soon…although I think I should invest in a heart shaped whole punch, to save myself some extra time! 
Like this one by Katie Mccaw at KatieMccaw.com: 
Using a heart punch, she cut out hearts from every card she received from her wedding shower and wedding. 

And, this upcycled heart garland I found via etsy.com:

http://www.etsy.com/listing/90153988/garland-scalloped-hearts-from-upcycled

Also, make sure to check my other blog o happy day  for more diy project ideas and home decorating ideas. 

fun and easy art activity for kids

I love melted rocks. Melted rocks rock. I did this art activity with two 6 and 7 year old boys and I think I enjoyed it more than they did (probably because I wouldn’t let them touch the hot rocks…and you know how boys are…they only want to do what they aren’t allowed to do:) ).  Something about the simplicity of the activity and watching the crayon melt and mix and swirl with the other colors is so relaxing.

You will need:

  • smooth rocks- pick out some rocks from your garden (preferably smooth rocks with flattened tops) or you can buy a bag of river rocks from a craft supply store for fairly cheap. 
  • crayons- The Crayola brand work perfectly fine…I had some oil pastels I also tried using…a few of them worked, the more thicker and more expensive they were, the LESS they worked because they didn’t melt as easy and didn’t mix with the other crayons. ALTHOUGH, saying that, one gold oil pastel I had from Blicks art store turned out to be the best. So, try a few different types and experiment. 
  • an oven- or access to one. 
  • An oven mitts (those babies come out of the oven hot) 
  • Foil paper
  • a large (and preferably old and well used) baking tray
Instructions: 
  •  Pre-heat the oven to 350 degrees Farenheit 
  • Wash off and dry the rocks if you grabbed them from the garden
  • Peel the paper off the crayons you want to use 
  • Put foil paper on the oven tray (to keep any melted crayons from getting on the tray)
  • Place the rocks on the tray and put them in the oven for at least 15 minutes (the hotter they are the better) 
  • Take the rocks out using the oven mitt (if you are doing this with children make sure to warn them NOT to place their hands directly onto the rock because they will born themselves) and place them on paper plates or foil sheets
  • Put the crayon onto the surface of the rock and push down firmly for a few moments. Use several different colors to get a colorful effect. 
  • Let them cool. 

and WHALAAA! Glorious- beautimus rocks!

Holiday DIY Decor: Yarn Christmas Tree Cones

I got inspired to do these super simple and cheap Christmas trees after seeing a pin on pinterest that came from Thriftyandchic.com: 

soo cute and rustic! But I didn’t have any hemp yarn so I used some thick wool yarn (and instead of styrofoam cones like the ones thriftyandchic.com uses, I used paper cones). All you need is a few yards of thick yarn of your favorite color, a glue gun and a paper or styrofoam cone and you are in business baby!

A simple, easy, chic and unique DIY Holiday Decoration!

Anyone out there done any of their own DIY Holiday decorations lately?  I am always looking for inspiration!

watercolor raindrops.

 Just a new little art project i’ve been getting obsessed with! 


 They are just watercolor raindrops or funny shapes that I then design with a black pigment ink pen.


                               Don’t know what to do with them really..

.I’ve been putting them on greeting cards..but not sure what else to do with them!
any ideas??? 

salt paintings art project.

I just finished another fun and easy art project with the program members at work. Like alot of the other art projects that have been wildly successful with my students, I found this one by scavenging through the internet. This one had all of the things I look for when trying to find a good art project: fun, easy and cheap. Here is where I found the project if you want to check it out:http://jojoebi.blogspot.com/2010/02/salt-painting.html
I’ve included my own set of directions and some hints and tips I found after doing the project several times. Have fun!
All you need is:
-kosher salt (the bigger the granules the better)
– glue sticks
– water colors & paint brushes
– craft paper
1) The first step is to create a design using the glue stick (I found that the purple colored glue sticks work well b.c. you can see your design better)
2) As soon as you have created the design with the glue stick, quickly pour the salt over the design …and be generous with the salt (If you are helping younger students or your children I usually stand by as they are creating the design and as soon as they are done, I pour the salt…this way more salt sticks to the glue before it has a chance to dry)
3) After letting the salt dry into the glue for a couple of moments (it dries pretty quickly and doesn’t have to be completely dry to start)…the fun can begin!
Dip your paintbrush into your chosen watercolor and a nice dip into a cup of water, then gently tap the top of the paint brush onto the salt design and watch the color absorb into the salt crystals!
tips and hints: Just a couple of things I found that help you make the best out of the project..
-the more colors you use, the more beautiful I think the salt art turns out.
– Also, it is important to tell your students, or those youa re working with, to just gently tap the edge of the brush onto the salt for the best outcome. Some of my students pushed their brushes down onto the salt with a lot of pressure and pushed the salt around with their brushes.
-Finally, it takes a little practice to find the right balance of color and water. If you put too much water onto the salt design it will just become soppy salt soup and if you use too little the color wont spread into the salt crystals.

Van Gogh and Seurat Art Projects


For the last couple of weeks, we have been working on two completing two large murals. I’ve mentioned http://www.artprojectsforkids.org in the past and my newly found love for the murals she creates that you can download.

For the individuals I work with, whom have various developmental disabilities, the projects have turned out to be a wonderful art activity. The members of the program have really enjoyed working together on the murals and it has been a great collaborative project. Each mural comes can be downloaded from artprojectsforkids.org for $5.00 a piece and the file is yours to keep and use forever.

For Van Gogh’s Starry Night, we used oil pastels and then laminated the project so the pastels wouldn’t smear. I really love how this one turned out.


We used regular old Crayola markers for Seurat’s Sunday Afternoon on the Island of La Grande Jette and then used elmer’s glue and modge podge to create a glossy smeared finish that made the mural look more like a painting…

Now we just need a place to hang them!